Last updated: 2024-06-25
Configuration of Keycloak for Spring Boot
To connect our Spring Boot application to an external Keycloak server, there are a couple of required or useful settings. This article covers the configuration of a Keycloak server for local development, or as a basic guideline for online servers. How to connect Keycloak to our Spring Boot app using OAuth/OIDC is described in this article.
If Keycloak has been enabled in the Security tab in Bootify, the setup described below is required. A file keycloak-realm.json is available in the project root or in the src/test/resources folder. This can be used to generate a realm with exactly this setup. This file already contains a test user and a project specific secret. When using the DevServer, the redirect URLs must include the port 8081 as well.
Keycloak download and first start
First of all Keycloak should be downloaded in the current version 26.0.8. The zip file is available here. After unpacking, the server can be started using ./bin/kc.sh start-dev --http-port 8085 (or kc.bat under Windows). By using port 8085 there will be no conflict with the default port of our Spring Boot application.
Our local Keycloak server should now be accessible at http://localhost:8085. After the first start we need to provide the admin credentials to access the administration UI.
Create Keycloak realm
After we are logged in as admin, we first create our realm without providing a resource file. Here we use "bootify" as realm name.
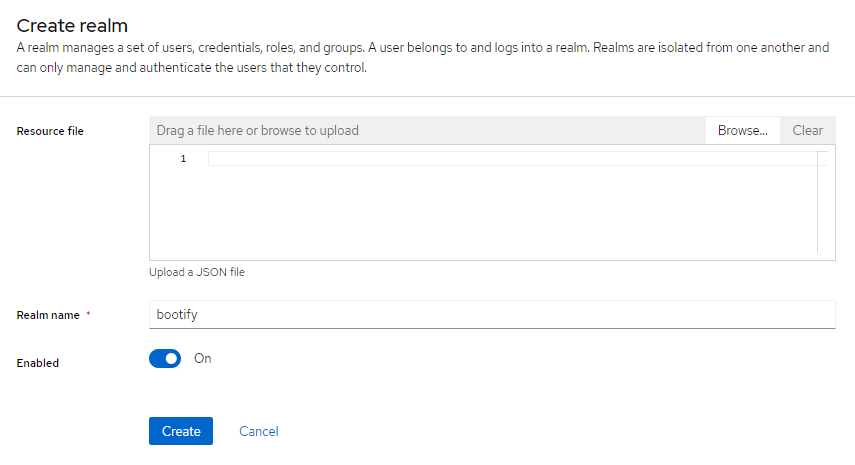
Creating our Keycloak realm
In the Realm settings we activate the user registration - this will allow a user to register himself if he does not have a login yet. Further roles can also be assigned individually to each user.
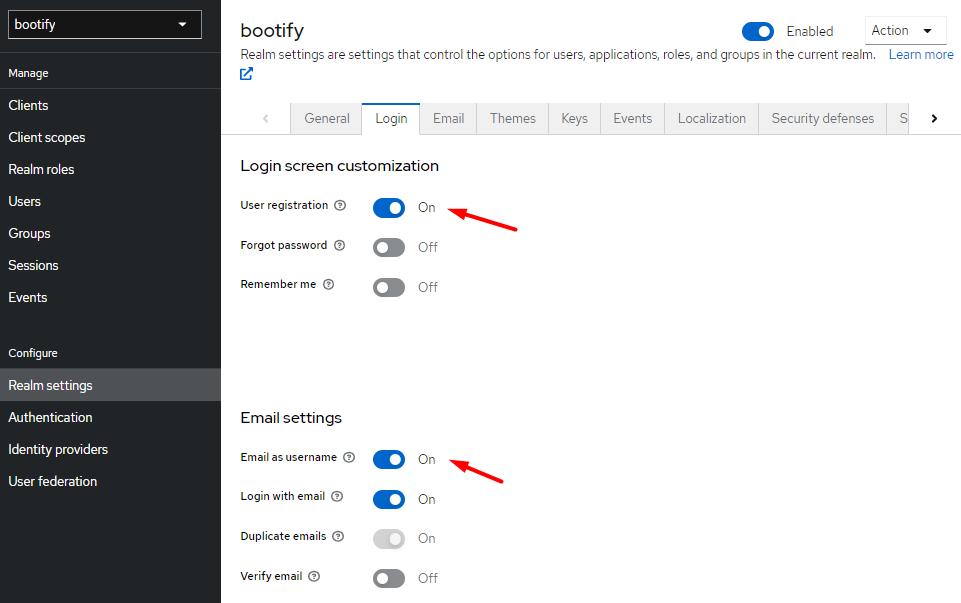
Configuring login settings of our new realm
We also enable the "Email as username" option - so there is no need to specify a dedicated username.
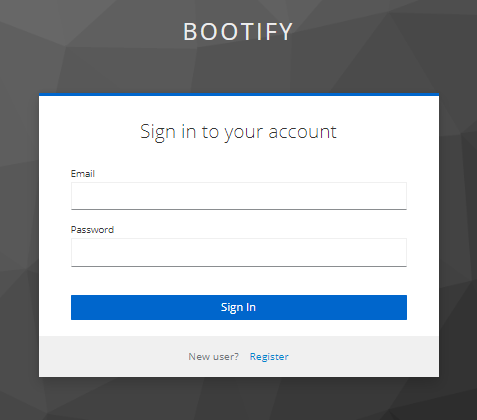
OAuth login page after allowing self registration
Create Keycloak client
The client in this context describes an application that can connect to Keycloak - so this corresponds to our Spring Boot application. We create it within our new realm.

Starting to create our client application
Within the "Capability config" we select the client authentication. If we are working with server-side rendering, we can active this setting - so our server must store and provide a secret. If we are working with a client SPA like Angular, we must deactivate this setting - as we cannot securely safe the secret, the OIDC type is public and no secret must be provided.
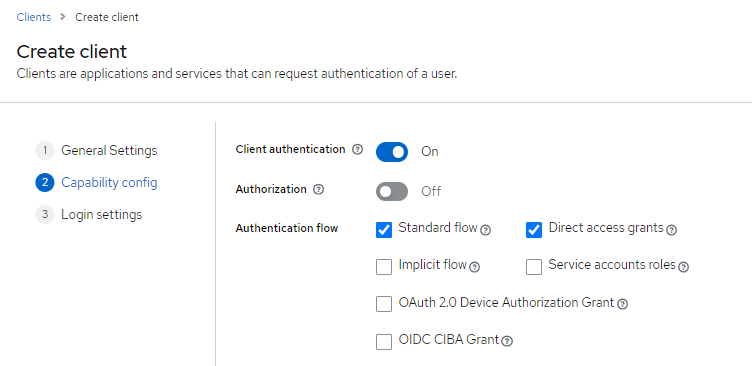
Enabling client authentication
We specify http://localhost:8080/* as a valid redirect URL for development - add port 8081 on top when using the DevServer.
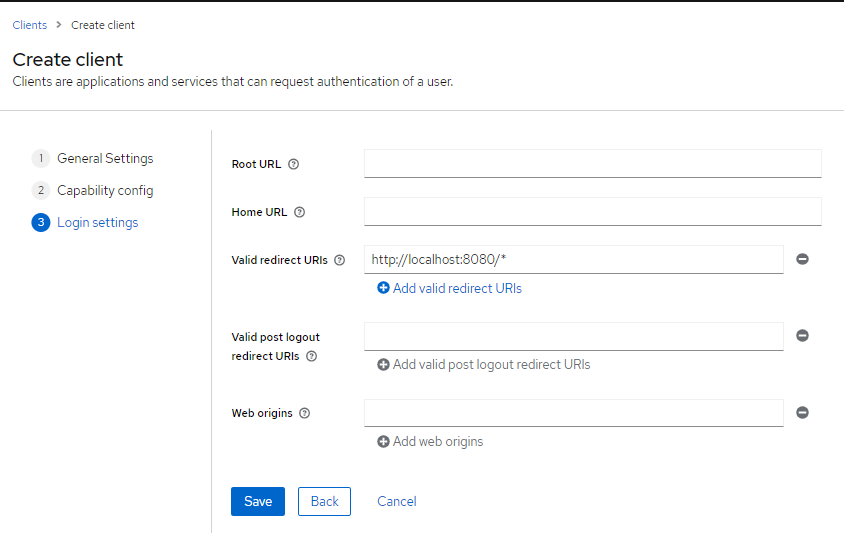
Configuring our redirect URL
Since we have already activated the client authentication, the tab "Credentials" is available for our client. Here we can now generate the secret and enter it in the application.yml / application.properties of our Spring Boot app. The key for that is spring.security.oauth2.client.registration.{provider-id}.client-secret - further settings are described in the already linked article.
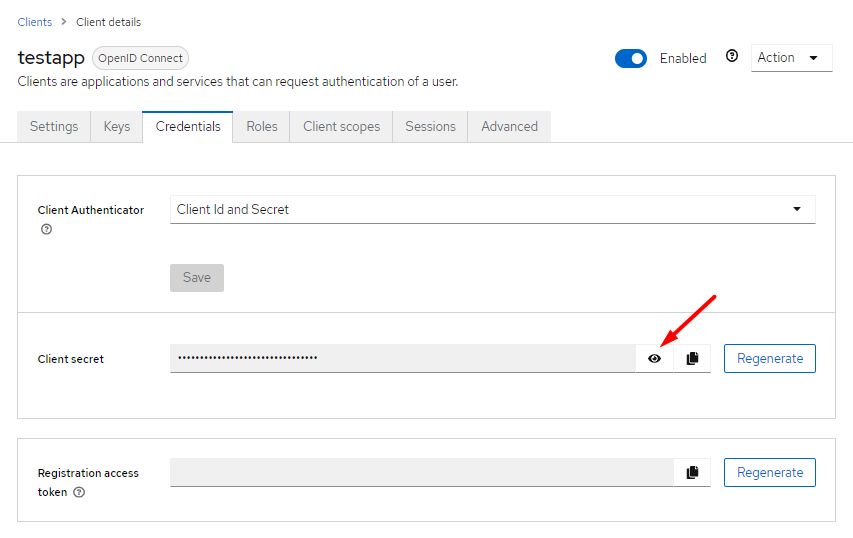
Copying the client secret into our Spring Boot app
Role configuration
Since Keycloak is primarily an IDP (Identity Provider), it also makes sense to manage the roles within Keycloak. To do this, we first need to create a role and later provide it to our Spring Boot app via the ID token.
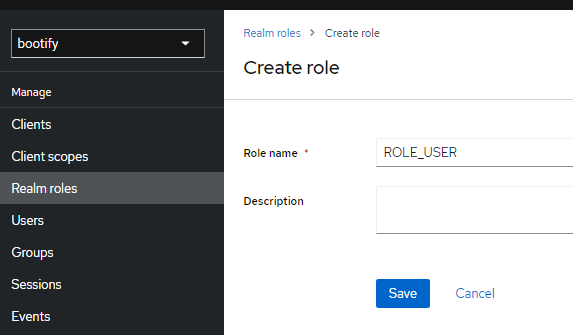
Creating ROLE_USER as realm role
In the Realm Settings under the tab "User registration" we now automatically assign our role to each registered user.
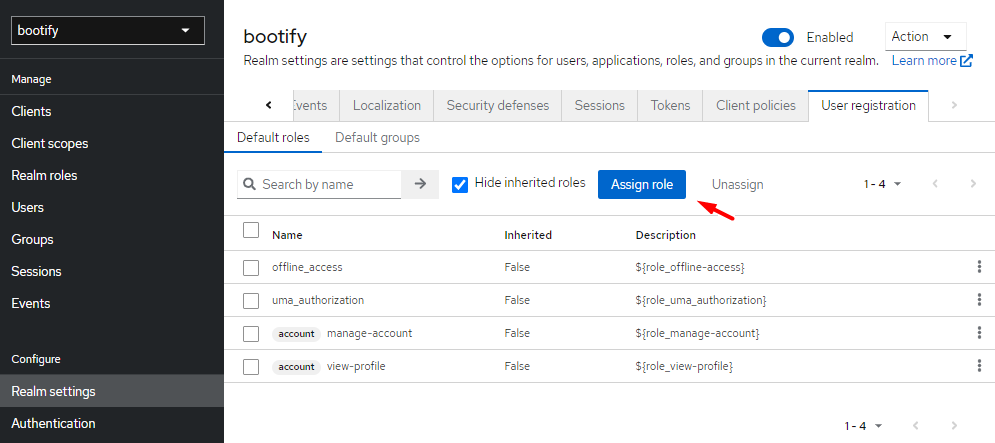
Assigning our role to each registered user
This means that our users already have the desired role - but we still have to make it available in our application. To do this, we first select our created application under "Clients" and then go to the dedicated scopes in the "Client scopes" tab.
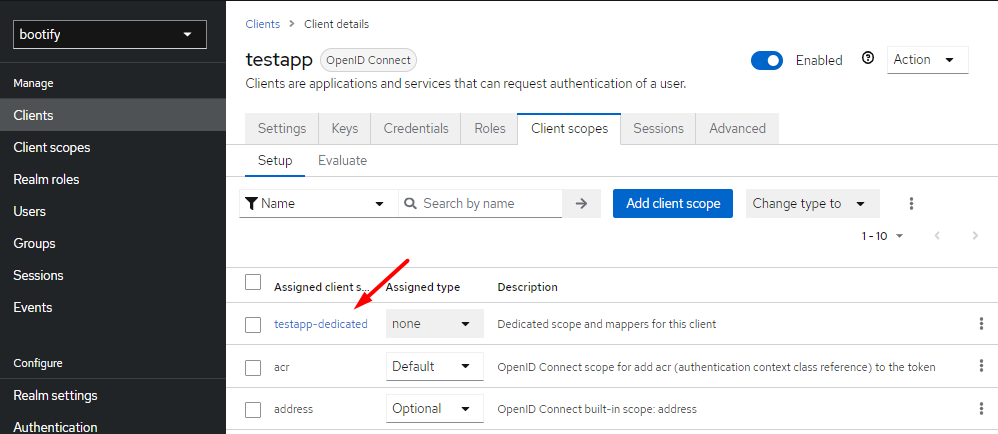
Opening the mapper definition of our client
Here we select the predefined mapper "Realm role".
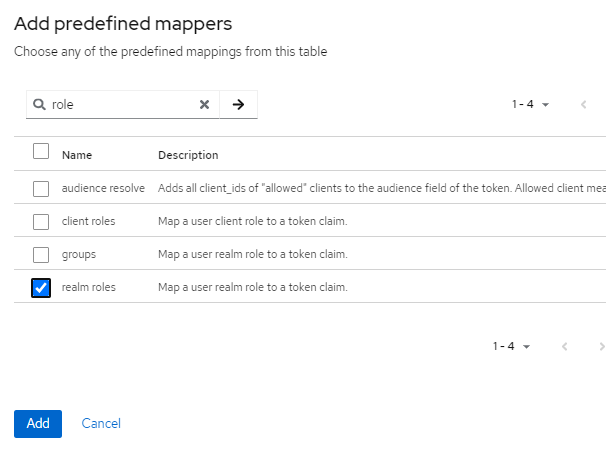
Selecting a predefined mapper
When creating it, we also activate the "Add to ID Token" option.
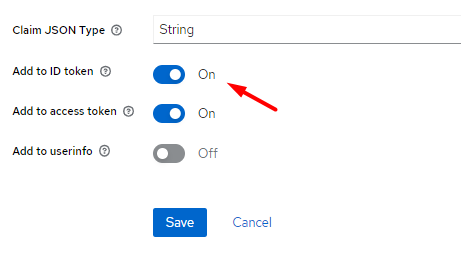
Adding realm roles to the ID Token
This completes our Keycloak setup! When we connect our Spring Boot application to our client as described, users can register and log in on their own. Users are automatically assigned the ROLE_USER which we can read via the ID token within our Spring Security config.