Last updated: 2026-10-07
Uploading custom files and templates
In the Custom Files tab, you can add your own files to the source code of your projects by uploading a zip archive. The zip may contain the following files:
- any files and templates to be added to the project output
- a .bootify file in the top-level directory that specifies the conditions under which files should be added
- a classExtensions directory with templates that add imports, fields and methods to generated Java or Kotlin classes
- a buildExtensions directory with template files to be included in your build files,
README.md,AGENTS.md, or generated app js/ts/css/scss
During the upload, a basic validation of the .bootify file as well as the templates is performed. Changed files are immediately available to new projects. With the next monthly automatic Git export, they also reach the reference branch of existing projects, where they can be reviewed and integrated. See the Enterprise template workflow for the full process.
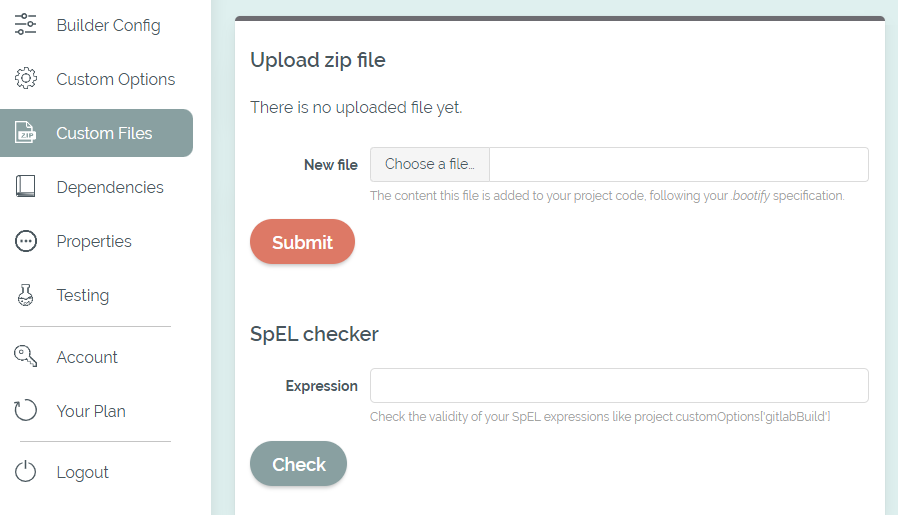
Upload a zip with your custom files
File handling
By default, all files in your zip archive are added to the output. Files in the root folder and below the buildExtensions and classExtensions directories are ignored. Included files can overwrite any regular file that would otherwise be created by the code generation.
The directory and file name in the zip archive defines the output path in your project's source code, except for the top folder, which is stripped. For example, a file /files/buildSrc/dependencies.gradle in your archive is written to your project as /buildSrc/dependencies.gradle.
If a file has the extension .ftl and a total of two dots (for example, myFile.txt.ftl), the content is evaluated as a Freemarker template and the .ftl extension is truncated when added to a project (myFile.txt). With only one dot (myFile.ftl) the files are written directly to the output without evaluation - in case you need a plain .ftl file.
The current project with its custom options is available, so a simple template could look like the following. More details about Freemarker in the official docs. The basic project structure with its available fields can be reviewed here.
An example Freemarker template with basic commands
.bootify schema
If present in the archive, the .bootify file must be valid YAML with the following structure:
An example .bootify specification
The rules are checked from the bottom up to the top against the files in your zip file, so the more specific rules should be at the bottom of the list. The pattern is required and defines on which files the rule should be applied.
The pattern is based on the glob syntax of the FileSystem class. For an explanation and more examples, see this link. The pattern must also take into account the top directory of your zip file (which is stripped when added to the project). This allows you to specify certain directories with your patterns and use different conditions or targets.
When the first matching rule is found for a file, the condition is evaluated to decide whether to add the file to the project's source code. If no condition is specified, it defaults to true. If you want to change the default behavior of adding all files to the output, you can add a general rule at the top of the list as in the given example above.
Conditions are written in Spring Expression Language (more details) with the project and its custom options available as parameters. Although the values of custom options always return a string, the values 'true' and 'false' are interpreted directly as a Boolean when returned from a condition. In more complex expressions such as the logical link with && or ||, however, the custom option must still be evaluated with == 'true'.
With the target property you can modify the target path and file name of your files. If not present, it defaults to currentPath + currentFileName and thus corresponds with the path in your zip file (excluding the top directory). The SpEL checker can be used for seeing what an expression evaluates to, using a project with default options in the background.
The following helpers are available in both SpEL expressions and custom FreeMarker templates:
basePackage/webPackage: the normalized package of thebase/webmodule, for examplecom.example.my_app.base/com.example.my_app.webin Modulith and multi-module projects. Without modularization both are the project package.basePackageDir/webPackageDir: the corresponding source directory including the fullbase/webpackage path, for examplebase/src/main/java/com/example/my_app/base//web/src/main/java/com/example/my_app/web/in multi-module projects. Both account for Java or Kotlin and the optional module prefix.testBasePackageDir/testWebPackageDir: the corresponding test source directory including thebase/webpackage path, for examplebase/src/test/java/com/example/my_app/base//web/src/test/java/com/example/my_app/web/.baseResourceDir/webResourcesDir: thebase/webmodule's main resources directory, for examplebase/src/main/resources//web/src/main/resources/.testBaseResourceDir/testWebResourcesDir: thebase/webmodule's test resources directory, for examplebase/src/test/resources//web/src/test/resources/.templatesDir: the base module's server-side template directory:src/main/jte/for JTE (including Kotlin templates), otherwisesrc/main/resources/templates/.webappDir: the web module'ssrc/main/webapp/directory, used by Angular and React.
All directory helpers are relative to the project root and end with /. For multi-module projects they include the module directory and optional project prefix. The base helpers and templatesDir use the base module; the web helpers and webappDir use the web module. Shared layouts and template components belong in base; feature-specific templates belong in their respective feature module. Without multi-module packaging there is no module directory prefix. Paths are available even when the selected options do not generate files in that directory.
For example, testBaseResourceDir + 'fixtures/example.json' targets a test resource, and templatesDir + currentFileName targets the configured template directory without manually replacing parts of a source path.
Use them to keep a custom class's target path and package declaration aligned without building package names yourself:
The corresponding LinkBuilder.java.ftl starts with:
Build Extensions
In the buildExtensions directory of the zip archive, you can provide additional files that will be evaluated as a Freemarker template and inserted into generated files at a specific location. Build files, README.md, AGENTS.md, and generated app js/ts/css/scss can be extended without fully replacing them.
Use the following links to find out the exact file names and locations for each build type:
So for example a file buildExtensions/gradleSingleRepositories.ftl allows you to add custom repositories to a Gradle project. For those files which are included in submodules of a multi-module project, the variables moduleId (for example "my-app-base") and moduleIdShort (for example "base") are available as well to add code for specific modules. Names and locations for multi-module builds are available on request.
Use buildExtensions/appJsTs.ftl to append code to generated app.js or app.ts, and buildExtensions/appCssScss.ftl to append styles to the generated app CSS or SCSS file. These extensions apply when the corresponding frontend files are generated.
Class Extensions
The classExtensions directory lets you extend generated Java or Kotlin classes without replacing the whole file. Place templates directly in this directory, using the exact, case-sensitive name of the generated class:
classExtensions/FileDataService-imports.ftladds complete import statements to the source file.classExtensions/FileDataService-fields.ftladds fields or properties inside the class, after generated fields.classExtensions/FileDataService-methods.ftladds methods inside the class, after the custom fields.
All three templates are optional. They are evaluated as FreeMarker templates with the same project and custom options available to build extensions. For example, a Java imports template could contain:
The corresponding fields template could contain:
The corresponding methods template could contain:
Class-level indentation is added automatically, so only indent the code within each method in your template.
Bootify adds class-level indentation automatically to fields and methods. Indent only the code within a method. Write snippets in the project's target language, including Java semicolons or Kotlin syntax as appropriate. Bootify inserts the rendered content as raw source code; it does not translate between languages, resolve import conflicts or replace existing methods.
Matching uses the final simple class name, without a package or file extension. If separate service interfaces are enabled, use FileDataService-methods.ftl for interface declarations and FileDataServiceImpl-methods.ftl for implementation methods. Custom method signatures are not automatically copied into the interface.
The classExtensions directory itself is never copied to the output. Only files directly inside it matching <ClassName>-imports.ftl, <ClassName>-fields.ftl or <ClassName>-methods.ftl are used. As with build extensions, inclusion is independent of .bootify rules; use FreeMarker conditions inside the snippets when needed.