Last updated: 2026-09-15
Git integration - backgrounds
With Bootify Professional, a project can be linked to a Git repository. Bootify maintains an up-to-date reference implementation of your project in the specified target branch. Important updates are described in the commit message, based on the last known export to the specified URL and branch. If the branch does not yet exist, it will be created.
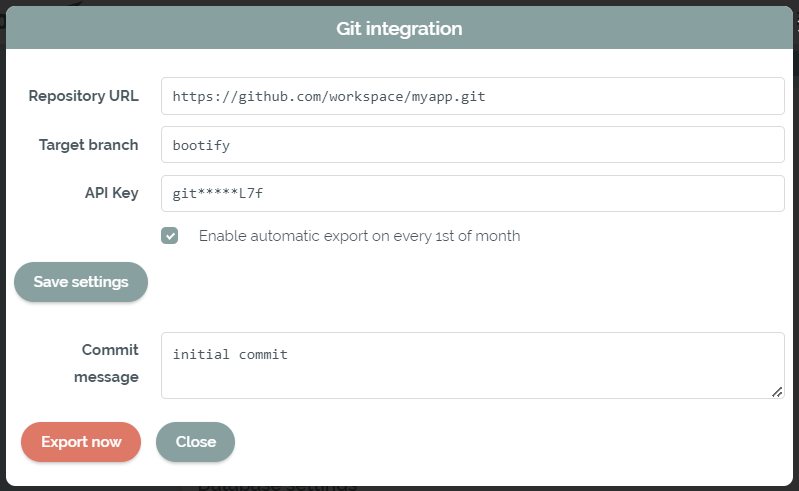
Git settings available with Bootify Professional
If the automatic export is active, the project is exported to the selected branch on the 1st of every month. New Spring Boot versions are normally released on the 3rd Thursday of each month - so the new version is also available in Bootify at the beginning of the following month. This means that the target branch is regularly updated to the latest Spring Boot version, including any required code changes.
A manual export can also be carried out at any time. With this any changed project settings or adjustments to the database schema are directly committed. If a change requires extensive developer testing first, the automatic export can also be temporarily deactivated.
The entire code in the target branch is always overwritten. Use this branch exclusively for freshly generated Bootify code and do not add manual changes. It serves as a reference that a developer or AI coding agent can compare with the actual application.
You can give an AI coding agent such as Codex or Claude Code the following prompt to update the application:
Review the agent's changes and test the updated application before releasing it. The commit messages in the reference branch provide additional context about version updates and code changes.
In the Enterprise plan, this process is also used to automatically roll out changes of your custom files and build scripts.
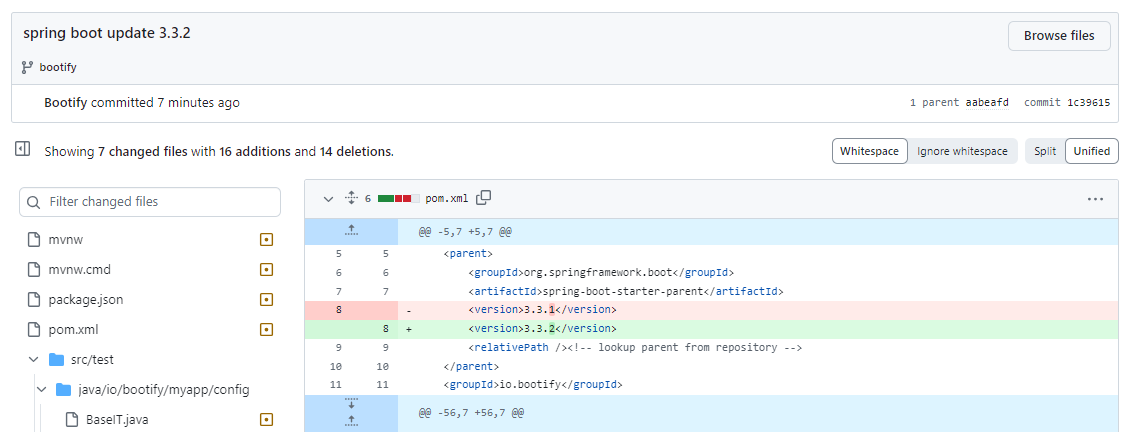
A commit from the automatic export
Your application code remains authoritative. The freshly generated reference implementation and its commits provide guidance, while the developer or coding agent decides which changes apply to the evolved application.
Authentication can take place either with an API key (HTTPS) or with a private key (SSH), whereby the creation of a dedicated API key is recommended. These should possess the minimum rights to read and write in the repository. In the following, it is described for the largest providers where the corresponding key can be created. If further options are required for the DevOps or Enterprise plan, please get in touch.
Authentication for GitHub
A fine-grained personal access token can be created for authentication with GitHub. This can be found under Settings > Developer Settings > Personal access tokens or directly here.
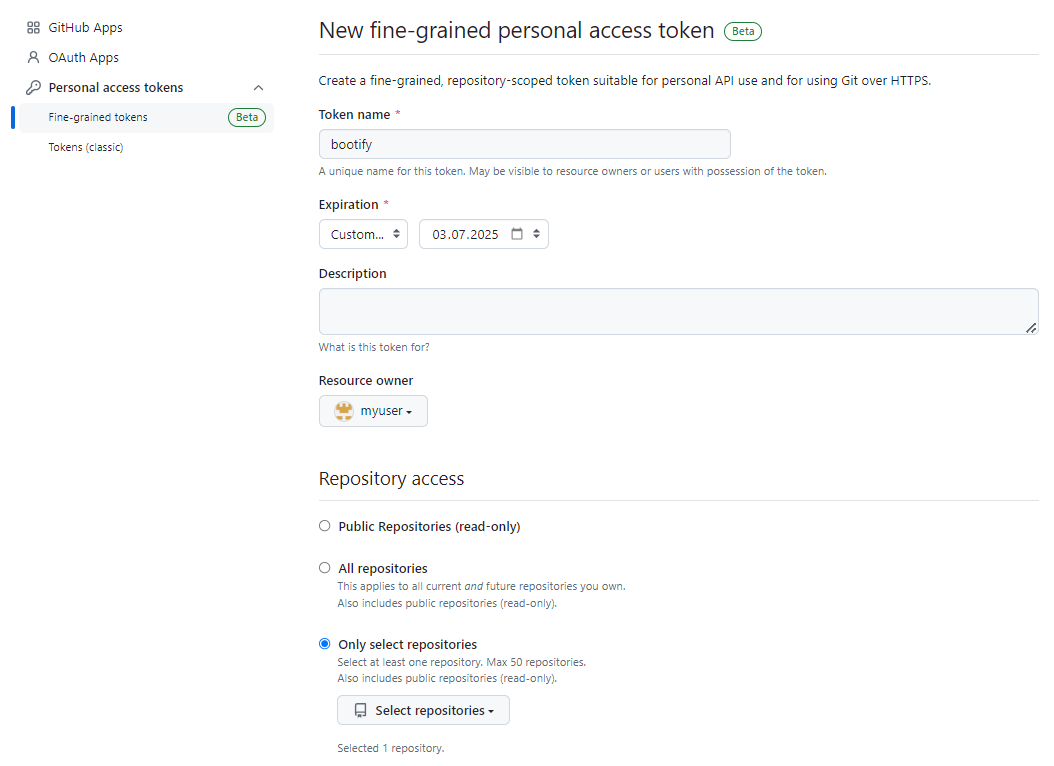
Creating a fine-grained personal access token in GitHub
The generated token can have a limited or no expiration. We must select the repository that is to be integrated with Bootify. Finally, we need to activate the Read and write permission for the selected repository in the Content area. If you plan to use Github Actions, Read and write access to workflows is required as well.
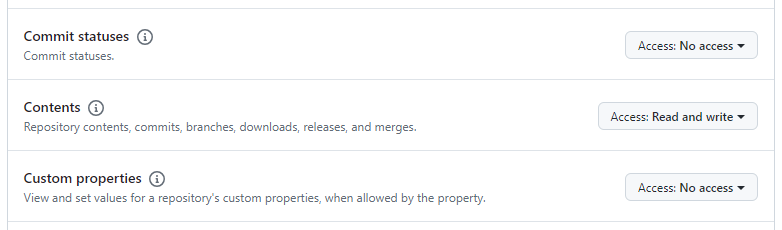
Adding permissions for our repository
Authentication for GitLab
Access tokens can be created for GitLab at the project level. To do this, go to Settings > Access Tokens and click on Add new token.
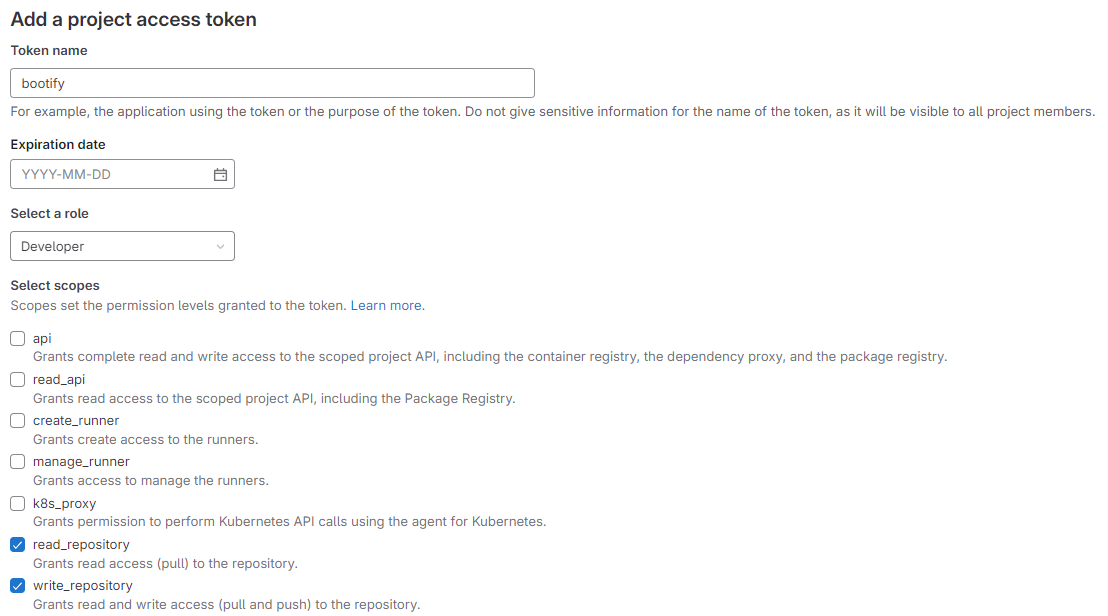
Project access token in GitLab with the developer role
The expiration date in GitLab is limited as well - the token must therefore be renewed manually after one year. To be able to read and write the repository, the Developer role and two repository rights must be selected. More backgrounds available here.
Authentication for Bitbucket
An app password can be created in Bitbucket to give Bootify access to the repository. In the Bitbucket account settings under App Passwords you can click on Create app password.
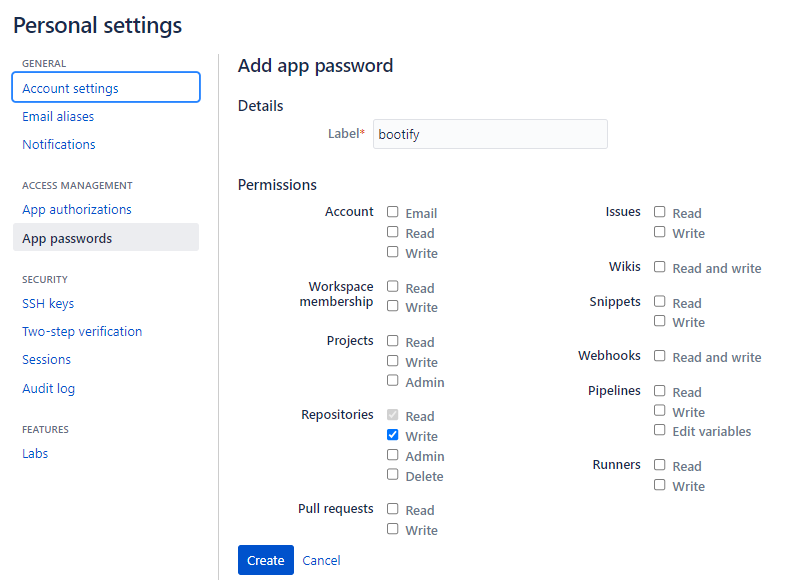
Creating an app password in Bitbucket
The rights to read and write the repository are required. More backgrounds available here.
The generated app password can then be entered as the API key in the Git settings at Bootify. Please enter the URL exactly as it is specified in Bitbucket (e.g. https://my-user@bitbucket.org/workspace/myapp.git) so that it also contains the user name.
See Pricing
or read quickstart