Last updated: 2023-06-29
Spring Boot REST API with database in minutes - Bootify in action
Let's create a Spring Boot application to see the basic features of Bootify in action. We want to build a simple microservice handling car parts, including a REST API with basic CRUD functionality as well as database access based on Spring Data / JPA.

Preview of our database model which we are going to create
With Start Project we are directly in the creation of our app. The project ID is stored in a cookie, however we should save our URL to return to our project later.
General settings
In the tab General we want to make a few adjustments. We change the project name from "my-app" to "car-parts", the project group remains unchanged. We want to work with Maven and Java 8, so we change these two points as well. The Java version can be found further below in the Developer Preferences group.
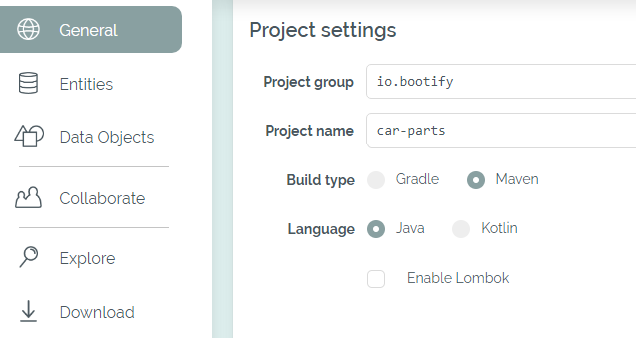
General project settings in Bootify.io
As database we want to use MySQL. In order to be able to send mails in a later milestone, we already add spring-boot-starter-mail as a dependency by searching for "mail" in the dependencies input. After this preparation we start designing our database schema.
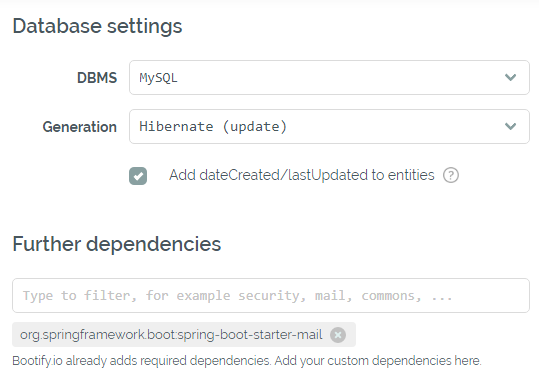
Database settings and dependencies for our simple microservice
Database schema
For the sake of simplicity we will only create the two tables "CarPart" and "Supplier", which are in a N:1 relationship. In order to do this, we go to the Entities tab, click on the plus and create our first table.
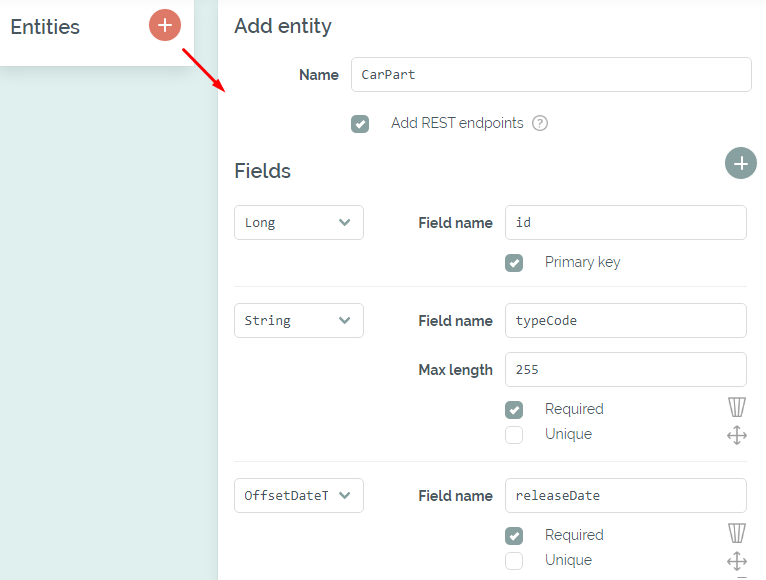
Creating our first entity
We keep the flag Add REST endpoints enabled, so that basic CRUD endpoints for this entity will be available. We can see later in the code preview that a RestController, a data transfer object and a service class are provided.
We leave our primary key with the name "id" and type Long. Because we have selected MySQL as the database, it will use the auto_increment feature when persisting entities later. For other databases a sequence would be used instead. Other available types for primary keys are Integer (same behavior as Long), UUID (generated by Hibernate) and String (has to be provided).
As custom fields we only want to add "typeCode" (String) and "releaseDate" (OffsetDateTime) for now. We create the table "Supplier" in the same way with the fields "active" (Boolean) and "name" (String).
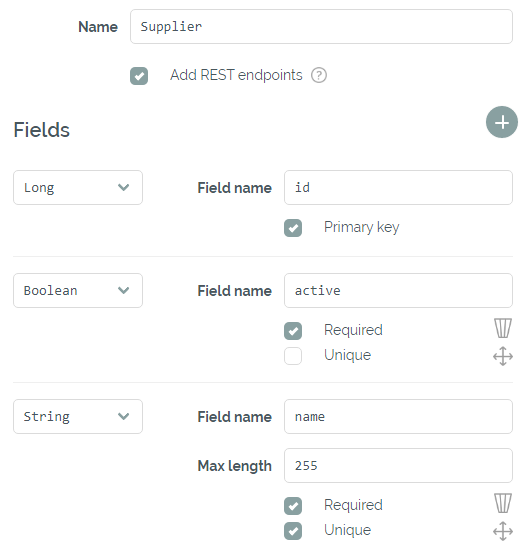
Creating our second entity
Finally our entities shall be connected with the N:1 relation, so we create the new relation accordingly.
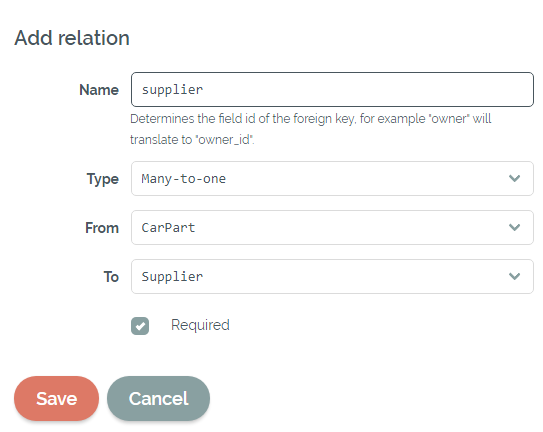
Creating the relation between our new tables
That's it - we've created the database model we have seen in the beginning. If you are working with an existing schema, you may use the Import Schema function in the Entities tab. Just paste your SQL script there and you can see your parsed model.
Preview and download
Now we can already view our project by clicking Explore. Besides the mentioned RestControllers and services, there are of course the entities with the corresponding JPA repositories. Relations are created with FetchType.LAZY by default to limit the SQL load of the Hibernate queries.
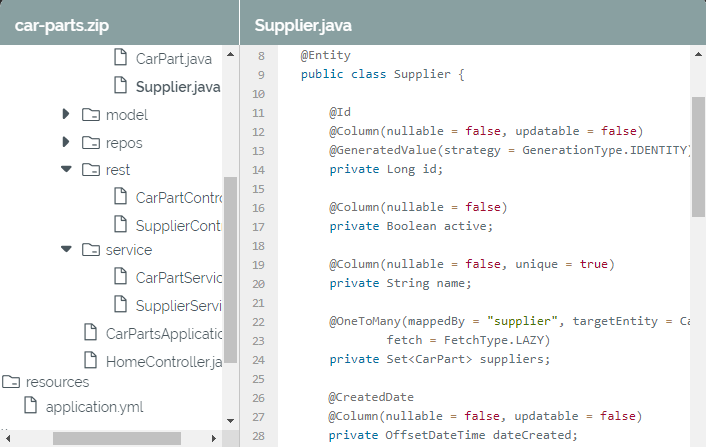
Preview of the generated code in "Explore"
At this point our basic microservice is already finished and can be downloaded. More features and the integration into our development environment are discussed in the following articles.
Start Project
No registration required
Further readings
Working with Data Objects
Integrating your project into IntelliJ