Last updated: 2025-12-08
General tab - backgrounds
The General tab is displayed first when a project is newly started or reopened. Basic settings for the project can be configured here, while the database schema can be created in the next tab.
Changes in the General tab are immediately synchronized with the server in the background. If the project is edited by a team member at the same time, the Bootify Builder will show a synchronization error if there is a conflict. In this case the page has to be refreshed first to load the current state.
Project settings area

Adjusting the Project settings
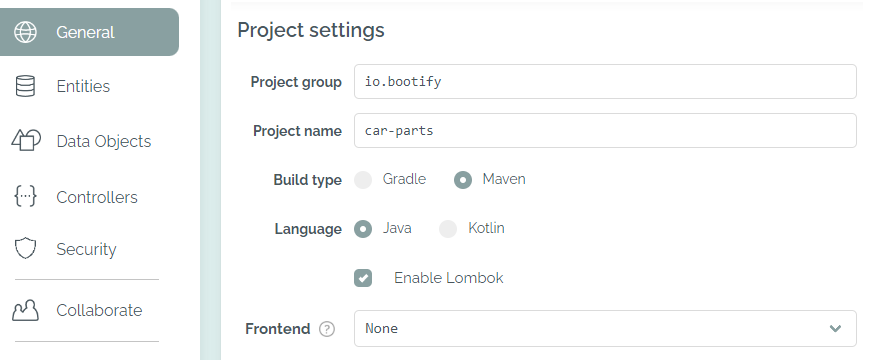
In the first section your project group and name can be defined. These are used as metadata for the project and are stored in the corresponding build file. In addition, the project group is used as a base package for the generated application.
Maven and Gradle are available as build types - the corresponding wrappers as well as the pom.xml / build.gradle file will be provided. If Kotlin is selected as the language, build.gradle.kts (Kotlin Script) is generated instead. Also, the required libraries and extensions for supporting Kotlin are included.
Lombok is available as an option for the Java language. With this, the necessary setup is added and less source code will be generated in the relevant places - the appropriate annotations are used instead (e.g. @Getter / @Setter for the entity classes). To use Lombok during development, the corresponding function must be enabled in the IDE - the IntelliJ setup is explained here.
As the last option Thymeleaf, jte, Angular or React can be selected as a frontend stack. Backgrounds are explained on this page.
If the type File has been selected for any entity or data object field, the file handling logic is included in the project. The handling of uploads and file retrieval is happening in the FileDataService, while the file id and name is stored as a JSON FileData at the selected fields. The actual file content is persisted in an entity FileContent, so it only needs to be loaded when required. The inputRow fragment / component is extended with the new type handling as well.
If a REST API is contained in the project - e.g. if the CRUD function on an entity or Swagger has been activated - a JacksonConfig is added to the source code to configure the ObjectMapper. In addition, the error-handling-spring-boot-starter library is integrated so that all errors are returned in a common format. Further customization options after the download are described in the documentation.
Database settings area

Database settings in the Free plan
In this section you can first choose the database you want to use. For a relational or embedded database Bootify will always include spring-boot-starter-data-jpa and the relevant JDBC driver as dependencies. In addition, the spring.datasource... settings are provided in the application.yml / application.properties - after downloading the source code, the password usually has to be adjusted first before starting the application. This allows the application to connect directly to the selected database at startup.
If MongoDB was chosen as a document-oriented database, spring-boot-starter-data-mongodb is included as a dependency - no further driver is necessary. Instead of using JPA / Hibernate, the documents are created using @Document and @DocumentReference. More background on this can be found in the MongoDB section.
If None is selected as a database, all references to Spring Data / Hibernate are removed. Selecting Other will include a dependency on other.database:jdbcDriver in the build file - so this must be replaced with the actual JDBC driver after download.
For schema generation, None (validate only) and Hibernate (update) are available in the Free plan. If None is selected, Hibernate will compare the existing database schema with the given entity classes at application startup and abort with an exception if there are differences. So here it is expected that the schema already exists in the desired form. With the option Update, Hibernate will recreate or update the database schema to the current state at application startup - beware, this migration does not always work reliably and is not recommended for production use!
Flyway and Liquibase are available options in the Professional plan. More explanations on the different approaches are available here. For MongoDB, Mongock is available as an option to initialize the collections including a JSON schema.
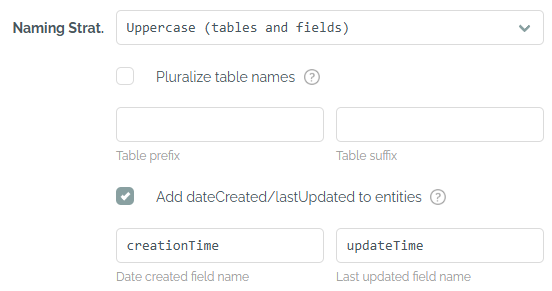
By activating the respective checkbox, dateCreated and lastUpdated fields can be added to each entity. These are automatically populated by an EventListener at the first persist (dateCreated) and during an update (lastUpdated). For this purpose the DomainConfig class is extended with the necessary setup to enable auditing.
Each entity should be created in singular. With the option for pluralization, these then contain an @Table annotation where the plural form of the name is defined. The Hibernate naming strategy then uses the name stored here as the input value, whereas MongoDB uses the given collection name directly.

Additional database settings in the Professional plan
In the Professional plan, a naming strategy can be explicitly selected. In addition to Springs default lowercase with underscores, uppercase and camel case are available for selection (tables only or tables and fields). The names of the dateCreated and lastUpdated field can be changed. A general table prefix or suffix can be provided as well.
Developer preferences area

Choice of other preferences for the generated code
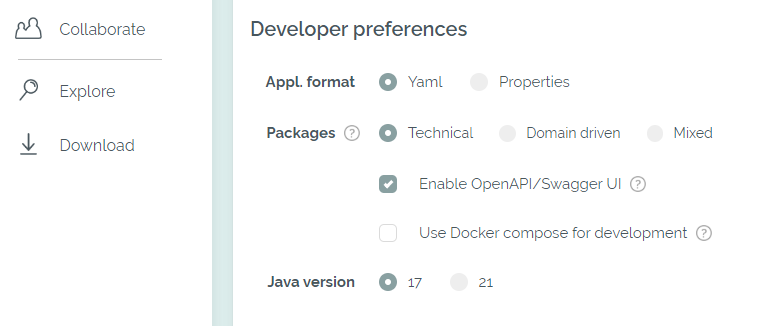
In this section further preferences for the generated code can be selected. The application properties can be stored either in an application.yml or application.properties - both formats are automatically picked up by Spring Boot. When the package structure is changed to domain driven, the classes are grouped by their respective entities - e.g. a package car_part is created containing the service, controller, DTO, etc. of this entity. Otherwise, the grouping is done according to technical criteria - with packages rest, service, repos, and so on containing all classes of the respective type. With the mixed option each entity has its own package with technical packages below.
If Swagger UI is enabled for the project, it will be accessible at http://localhost:8080/swagger-ui.html after the application has been launched. For this, Bootify adds the springdoc-openapi-ui dependency as well as the pathsToMatch property. Depending on the other setup of the project, the configuration is further refined - for example, the SwaggerConfig is added to describe the error responses of the error-handling-spring-boot-starter library.
With the option for Docker compose the module spring-boot-docker-compose is added to application (see reference), together with a docker-compose.yml containing all required services - like your selected database. When starting the application, Spring Boot will automatically execute docker compose up and wait until the services are available. Because of the setting spring.docker.compose.lifecycle-management=start-only the container will continue running afterwards and can be stopped manually when required. If MongoDB is the selected database, a Replica Set is initiated so that transactions are available.
Java 17 is the required version since the release of Spring Boot 3. Java 25 is the latest LTS (Long-Term-Support) version and fully supported as well.
As a deployment option, Heroku via GitHub actions can be selected. This adds the Procfile and system.properties fitting for your configured project. When your code is added to a GitHub repository, a workflow for deploying to Heroku is available. Your app in Heroku must be prepared in advance - more details here.
Bootify automatically prepares all dependencies so that the application can be directly started after download. In the last input field additional dependencies can be added, which will be included in the build file.
In the Professional plan, the Advanced settings area is also visible. The available options are explained in this article.
Start Project
No registration required