Last updated: 2025-08-22
Modules tab - backgrounds
After Spring Modulith or the multi-module setup has been selected as the modularization approach for your project, the Modules tab is available. Divide a monolith into several, logically linked modules to improve the maintainability of your code and collaboration among developers.

Your custom modules and their assigned entities
Your custom modules created in the Modules tab are always integrated between web and base. In the base module, basic functionalities are provided that all other modules can use - for example, the provision of a MailService or frontend helpers. Indirect dependencies are available anyway, so the final module structure only contains required and valid references.
With Spring Modulith, a regular monolithic application is split by treating the packages beneath the main package as modules. Access to other modules is then only allowed along the package structure, and only to the classes in the top-level package (or in exposed packages). All resources remain in src/main/resources, but may be separated by module internally. Using Liquibase or Flyway is strongly recommended, as otherwise foreign key constrains accross modules cannot be generated by Hibernate.
Module dependencies are enforced by Spring Modulith - see also the ModularityTest in a generated project. Since Spring Modulith derives the module structure from the actual dependencies in the code, the generated documentation may initially be different from the structure in the Bootify Builder. The modulith endpoint is selectable for Actuator in a Modulith project.
In a multi-module setup the build file is extended (Gradle) or divided (Maven). Each module provides its own folders src/main/java and src/main/resources, so that resources are also contained in their respective module. Since the modules are assembled into a real jar and integrated as a Maven/Gradle dependency, access outside the defined path is not possible. The artifacts for a possible frontend are contained in web (.js, .css, etc.). In addition, all modules of the application are combined in web so that the final, executable .jar is generated here.
Here is a useful article on best practices for multi-module projects.
Module assignments
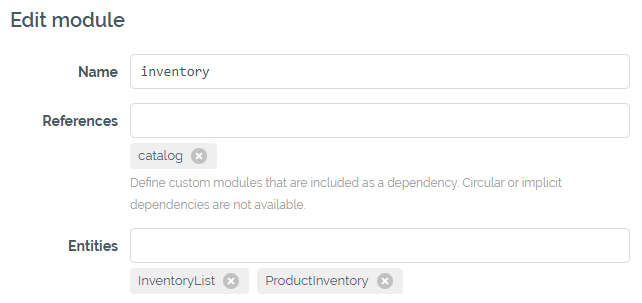
All entities, data objects, enums, custom controllers and security configs can be assigned to a module so that the generated code is contained in the respective module. As soon as custom modules have been created, the corresponding dropdown is visible in the form. Entities can also be selected when creating or editing modules, so that multiple entities can be reassigned at once.

Editing a custom module
As the module structure creates a dependency graph, the artifacts are only available according to this structure. Therefore, an invalid selection in the Bootify Builder is either not available or blocked with a validation error. Relations between entities in different modules can only be unidirectional. The "reference check" for the CRUD functionality is triggered with application events, so it also works accross module boundaries.
Generally it is recommended to proceed in the following order:
- Creation of your custom modules and their dependencies
- Assignment of the security configs
- Assignment of entities from top (
web) to bottom (base) - Assignment of the remaining objects
For easier usability there are some fallbacks in the Bootify Builder when changing modules: if referenced types on fields or controllers are no longer accessible, they are reset to String. A relation is automatically switched to unidirectional if the linked entities are in different modules. This can be avoided by assigning several entities at once in the Modules tab. After completing the assignments, the final setup should be reviewed.
An enum used in a security config must always be in the base module, as the protected paths can be selected from all modules (higher or lower relative to the security config's module). In general it's recommended to protect only paths from higher modules (so they rely on security configs of lower modules), but that's not enforced.
Integration tests
For Spring Modulith, all tests are annotated with @ApplicationModuleTest and the setting BootstrapMode.ALL_DEPENDENCIES - thus, the entire module context is loaded according to the module structure. Recurring parts of the integration tests are contained in the shared abstract class BaseIT (including any Testcontainers).
In a multi-module project, the BaseIT class is contained in the test part of base module. All other modules reference the test-jar of base for this purpose. Any test data is provided by the respective module so that further test dependencies are integrated if required. Transitive dependencies are not possible for test-jar. Integration tests may also execute the clear scripts after all tests have been completed (executionPhase = Sql.ExecutionPhase.AFTER_TEST_CLASS) to avoid blocking other modules during development.
In both modularization options integration tests may be annotated with the "nosecurity" profile. This deactivates the autoconfiguration, as Spring Security already exists as a dependency, but is not yet configured in the respective module.
The Bootify Builder is a powerful tool for configuring complex Spring Boot applications with a modularized setup and Spring Security. Depending on the use case, further aspects can be optimized, but the generated code provides an excellent basis with numerous best practices.
See Pricing
or read quickstart